Wednesday, 16 March 2022

Multiple Flap Love Card | Tubby Craft

 Hi Friends,

 I have got this lovely project to share today.

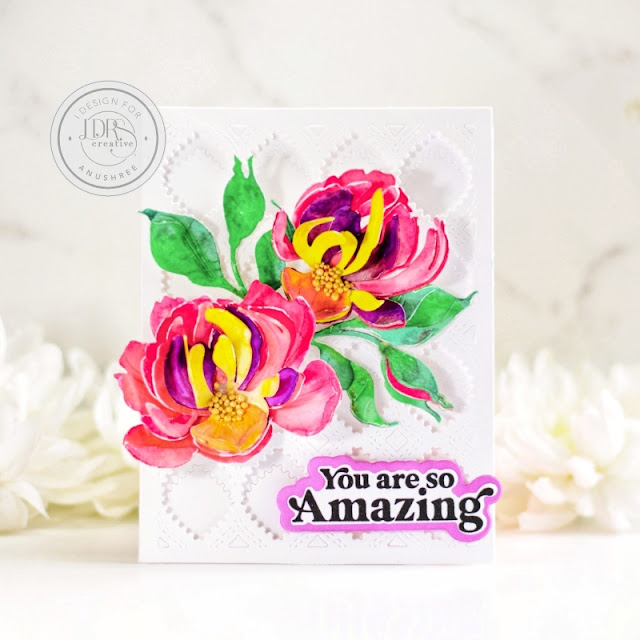
I have made a multiple flaps card using Tubby Craft stamps and inks.

Let me share some pictures first,


 This card measures 8" 10" while folded and tied with ribbon. To make each flap I have attached with an extra half inch paper from the back side of the card.


This is how it looks when opened completely with its 4 flaps.


Each side of the card is covered in pattern paper and some small embellishments.


I have kept some space inside the card to write the messages.


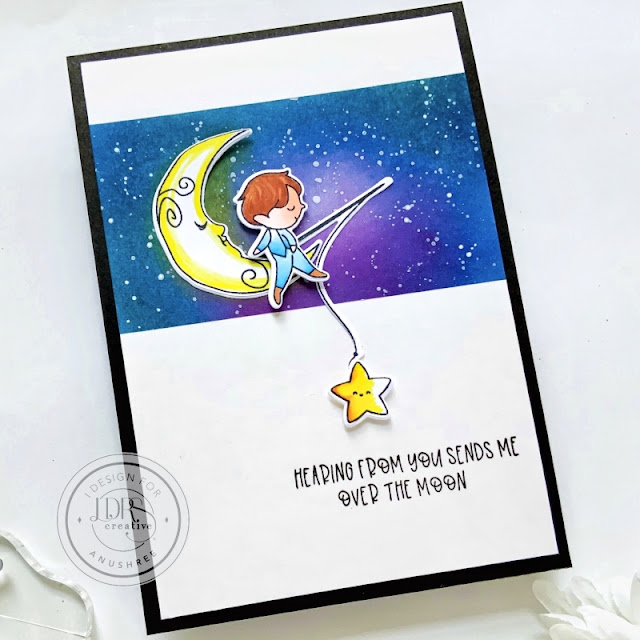
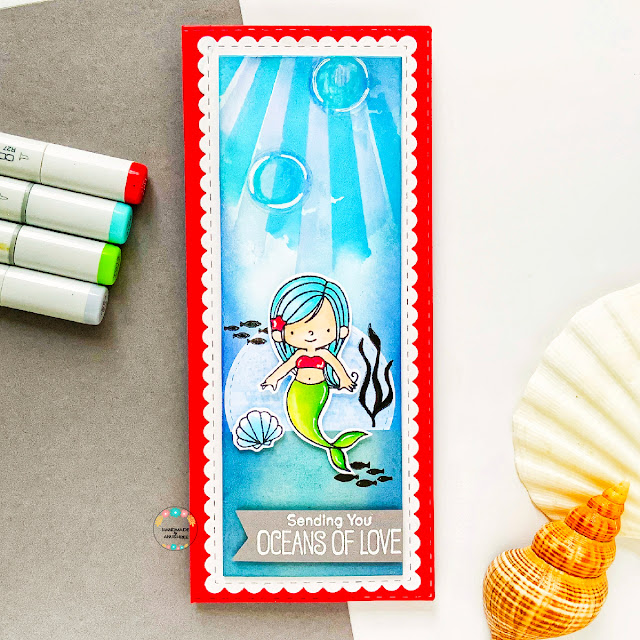
To make my card front, I have used some pattern paper in the background and topped up with the cutest stamp image from Couple Hugs stamp set.

I have done the colouring using alcohol markers. 

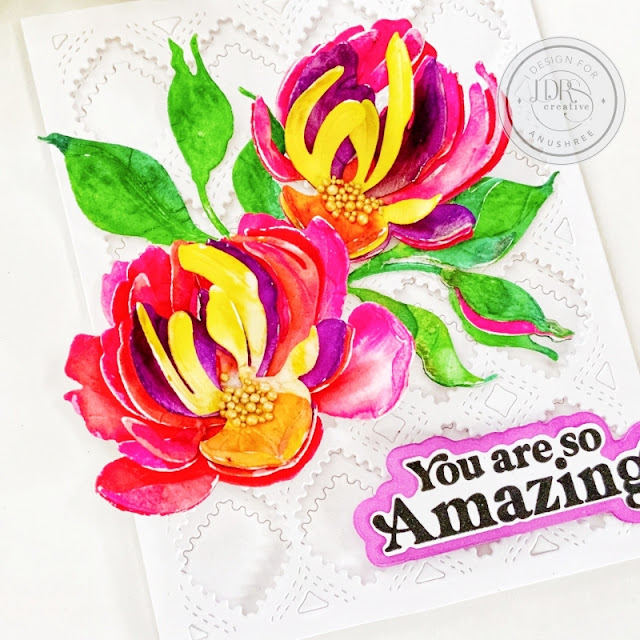
The sentiment is stamped in Jet Black Tubby Craft ink.

I have attached a coordinated organza ribbon from the back of the card. This add a lot of charm to the card along with securing all flaps together.

I have used


Hope you liked this card and will definitely give it a try.

Thanks for stopping by.

Hugs,Anushree

I am adding my card to


Tuesday, 15 March 2022

Peony Floral 2D Card | LDRS

 Hi Everyone !! Anushree here today!

Did you check the latest release? It's filled with gorgeousness all over. Here's the link February 2022 Collection 

I have used this very pretty Peony Layering Dies for my card clubbing it with Pretty Things Coverplate Die-iii

To make my card, I die cut the cover plate die on white card stock twice and arranged it by placing one a little up than other. I created dimension between these two using foam tape in the middle and adhered this panel onto a white card base of size 4" x 5.25".

Next I cut-out Peony Layering dies on a watercolour cardstock and started inking with


To do the process, I first tapped some ink on my glass mat and then sprayed some water on to it. I used a brush to smear the colour on my die cut. You can even try placing the die cut directly onto water sprayed colours to get a different bubble texture.


Once I finished colouring each die cut, it was time to arrange them. With layering arrangement guide on the back of the die packaging, it was super easy to make these pretty florals.

To give them a more natural look, I adhered some gold pearls in the centre of the flowers.

I adhered the florals onto the white die cut panels as seen.


Lastly I stamped the sentiment from Everyday Sayings Stamp set in Raven Hybrid Ink and die cut using the Coordinating-dies. I adhered it using foam tape again on the white die cut panel.

This completes my card in a bit 2D form and I hope you liked the making of this card.

Thanks for stopping by. Will be back soon with more inspiration.

Till then, Happy crafting. Hugs, Anushree


Monday, 28 February 2022

Feature Day 2 | LDRS

  Hi Friends,

Its Feature Day 2 at January & February collection features. I have got today a heat embossed card on Vellum.


I have used Woodgrain stamp set for the background. For the floral, I have used Joyful Blooms stamp set. It's heat embossed on vellum in white.

Sentiment is stamped in black ink.

Hope you liked it.

Thanks for stopping by.

Hugs,Anushree


I am linking my card to

http://casology.blogspot.com/2022/01/week-400-affection.html


Thursday, 24 February 2022

2D Floral Card | LDRS DT post

 Hi Friends,

Its Feature Day 1 at January & February collection features and I have got this super pretty 2D floral Thank you card.


I have used Floral Scallop Slimline Dies, Everyday Saying Stamp set and coordinating dies and One Fine day paper pack.

Sentiment is heat embossed in Gold using WOW powders.


To create florals I have used ball tool and embossing pad to create 2D look, centres are filled with gold pollens.

Hope you liked the card.

Thanks for stopping by.

Hugs,Anushree

I am linking my card to

https://www.simonsaysstampblog.com/wednesdaychallenge/simon-says-anything-goes-92/

http://wordartwednesday.blogspot.com/2022/02/anything-goes-weeks-531-532.html

Sunday, 20 February 2022

Never Stop Dreaming | LDRS Design Team Post

Hi Everyone!! Anushree here,

I am super excited to announce that I am joining LDRS Creative Design Team ! I have two cards to share with you all today.

I have used Never Stop Dreaming stamp set with its coordinating dies and 1/2" Stitched Slimline Background Strips Die  from the new release to make these cards.


This stamp set is really adorable. I started with one but ended making two cute cards. The sentiments are also very beautiful.

Here's a close up of my first card


To make my card, I took a grey card base of size 4" x 5.25". Next I took a white card stock and masked it leaving a big circle on top right side.

I started ink blending Dark wash jeans ,Bali blue ,Fandango and Grape ape on the round mask free space. After that, I splattered some white paint on top of this ink blended piece before removing the mask. Next I stamped the sentiment in deep black Raven ink .


I cut out two white pieces from 1/2" Stitched slimline background strip die and adhered on sides of my white panel as seen.

I stamped the images and coloured in alcohol markers. After finishing colouring, I used coordinating dies to cut out the images and adhered using foam tape . Now this finished panel is adhered to grey card base to complete it

Now onto my second card,

I started with a black card base of 4" x 5.25", I took a white panel a bit smaller than card base and masked it leaving a rectangular space. Same way like my first card, I did ink blending using same set of colour inks. Then I added white splatters onto it.


I stamped the images and coloured in alcohol markers. After finishing colouring, I used coordinating dies to cut out the images and adhered using foam tape and clear glue. Lastly I stamped the sentiment on this white panel and adhered it all on the black card base.

Hope you enjoyed both the cards and inspired to make some too.

I will be back soon with more inspirations, till then happy crafting !!

Hugs,Anushree


Wednesday, 2 February 2022

Simon Says Stamp | You are Loved

Hello Friends,

Season of love has just begun !! Here we are in the month of February. I have got this CAS card in love theme,

I have used Simon Says Stamp "You are Loved " Wafer die along with Darice embossing folder, Diamonds with embroidery lines in the background.

To make my card, I took a red card base. Next I took a white card stock and dry embossed it with the folder. 

I have done die cutting on both white and red card stock to get the sentiment. It's adhered using foam tape.

Hope you liked it.

Thanks for stopping by.

Hugs, Anushree

I am linking my card to

https://www.simonsaysstampblog.com/wednesdaychallenge/simon-says-anything-goes-91/

https://daranddiane.blogspot.com/2022/02/hearts-challenge.html

https://www.simonsaysstampblog.com/mondaychallenge/?p=26541

http://cutitupchallenges.blogspot.com/2022/01/challenge-244-hard-to-say.html

https://colorfuloptions.blogspot.com/2022/02/february-2022.html

http://casology.blogspot.com/2022/01/week-400-affection.html


Tuesday, 1 February 2022

Mermaid Love | MFT

Hi Friends,

I am just not getting over with this beautiful Mermaid stamp set from MFT . It's in the name of BB Mermazing stamp set.

Here's my card

I have made this card as a Slimline card with lot of Copic colouring. Hope you enjoyed it.

I am entering my card to

https://www.mftstamps.com/blogs/news/wsc578