Showing posts with label Papericious. Show all posts

Saturday, 11 July 2020

Recycling Fun !!

Hi Friends,

I have this new project today where I have recycled some carton boxes into a purse album.

Here are some pictures of the album


This album holds pictures,some cards and Gift tags.

It came out pretty well.

Thanks for stopping by.

Hugs,Anushree

Friday, 10 May 2019

Mixed media Wall clock

Hello Friends,

I have a beautiful Mixed media Wall clock for today.This wall clock is done for a lovely wife who wants to gift handmade to her husband.He will be celebrating his birthday in next few days.I am very happy with how it turned out and quiet sure that the couple will cherish it forever.

Here are the pictures,


For this clock I was inspired by the April Challenge from Papericious,Anything Goes with Flowers and Butterflies.

How I made it:

I took a raw clock base and applied Gesso on the whole base.Next I did some stenciling using various stencils from Tim Holtz and Craftreat.

In the center,I have used Pretty peonies Decoupage paper from Papericious. This paper has both the flowers and butterflies.I have used Mod Podge glue to adhere the decoupage papers. Next I have applied some inks from Tubby Craft and let it dry.

After that,I glued the Mdf cut Roman numerals ring around the center.I have also used some of the couple's pics to personalize the clock.

To complete the clock ,I have adhered some handmade flowers and butterflies.

Products used:


Hope you liked it.

I am entering this project here:


I am inspired by the colors like Blues and purples in the picture,Have also added Butterflies in my work as the twist suggested.

I have added some metallic beads in the flower centers as pollens, also the hands of the clock are in metal.hoping that qualifies it for the challenge.

Thanks for stopping by,Hugs Anushree


Thursday, 14 March 2019

Happy Woman's Day!!

Hello folks,

Today I have three quick cards which I made to be gifted on Woman's day.I have used supplies from Winnie and Walter,Heartfelt Creations,Ellen Hutson,Studio 9 and Papericious. Let me take you through each one by one.

Card 1

Procedure
I have taken a pattern paper from Papericious Femina edition and Die cut using Winnie and Walter's Essentials,Audrey Cutaways before adhering to to main card base.Stamp the girl image from Ellen Hutson to white cardstock and water color it using Zig markers.On the pattern paper,I have used a stamp from Studio 9 to stamp some gold paint lightly on and over the lines.

The sentiment is from Winnie and Walter's In Bloom stamp set,stamped on yellow cardstock with Black Archival ink.I have used some gold beads and a image dome to embellish the card.Adhere all as shown.

Material used
Stamps from Winnie and Walter,Ellen Hutson and Studio 9

Pattern paper from Papericious Femina edition

Card 2


Procedure
Take a card base and adhere pattern paper as shown.Now adhere rainbow color strips as shown.The flower image is from Heartfelt Creations colored with Alcohol markers.The sentiment is from Winnie and Walter stamped in Black archival ink.Lastly some embellishments attached to complete the card.

Card 3


Procedure
Adhere pattern paper on main card base.This pattern paper is from Papericious Femina edition.The girl image is from Eklen Hutson again,stamped on white cardstock and colored with alcohol markers.
The sentiment is from Penny Black stamped in Blue Archival ink.

Hope you liked all the cards.

I am entering these cards to following Challenges


Thanks for visiting the blog!!

Hugs,Anushree

Monday, 28 May 2018

Family layout

Hello friends!!

This is like a much waited post,but I am glad to finally present it today....so story begins like this...Some time back I bought few scrapbooking supplies for myself from Altenew..a friend told me she is travelling to U.S for short period and will be able to get my parcel soon...parcel reached her bang on time...but(sadly)she had to stay back for another 3 weeks for some office work...hmmm so it reached my hands after a long desperate wait for more than one month...but finally it's here and I am loving it...My today's layout is all about my lovely and supportive family of two little Princesses and an amazing husband...without them nothing would have been possible...SO now without much ado..here is my layout


For the background,I have used a lovely pattern paper from Papericious Femina set.I then added Dovecraft gold glitter glue on some portions to enhance the base paper.I also did some watercolored flowers in yellow diagonally on the base paper.


Then I started putting my family picture and then put a frame around it from "Our family scrapbook collection.I used another sentiment frame from same scrapbook collection and adhered it to one of the sides of the pic.


I adhered the Floral flurries washi tape onto white cardstock and fussy-cut the images to create layers and add dimension to the layout. The heart on the camera is an adhesive wood veneer from our family scrapbook collection.


The banner is fussy-cut from Femina paper pack and I have handwritten the sentiment "Joy of Togetherness".I have added handmade butterflies on the top left corner to play with additional twist of Papericious challenge.Also I was inspired by Enza's both Altenew layout where she has added Butterflies.I have also added some papericious chippies,the round circulars on bottom left side and top right,after coloring them Blue with Altenew alcohol markers.

Lastly I have added love sentiment which is a sticker and few enamel dots.

I have been admiring Enza's layout's for Altenew Sketch challenge#9 and glad to finally play along with the challenge.Here is Enza's layout which inspired me to make one


I have played both with the sketch and the color combination .

Now onto choosing my background,I had no doubts after seeing Erum's card with Femina paper,Here is her card


I had real fun making this layout and my family is loving it.

Adding my layout to following challenges:


I have added paper frame to my focal picture.

Thanks for visiting my blog.

Hugs,Anushree


Monday, 9 April 2018

Beary Happy Birthday!!

Hello friends,

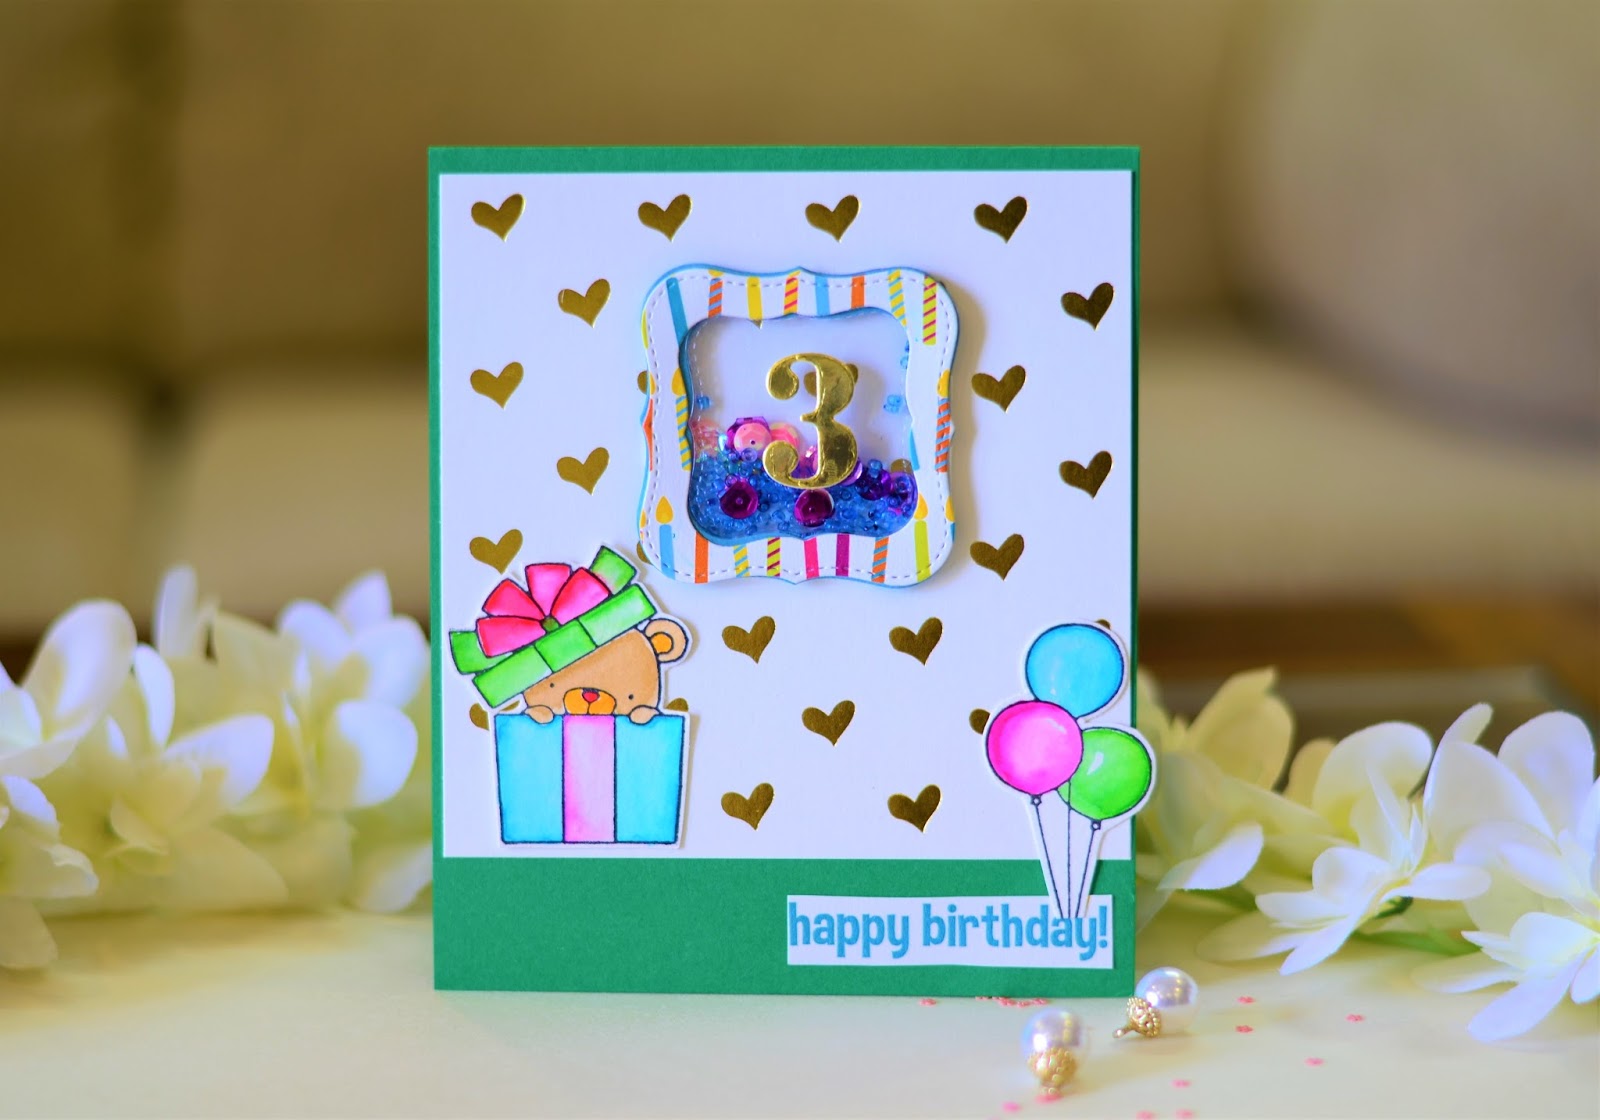
I am back on my blog with a cute birthday card...There is a small gap in my posts as I was on a small family vacation...This card I made before leaving for my vacation...couldn't post as my pictures were not ready....Let me share it before I talk more on this...Here's my card


While making this card I was completely inspired by Priya's card posted for Papericious March Birthday Challenge.I have tried making it sparkly birthday card by adding gold foil sheet and sequins.


I have used Papericious Gold foil heart sheet from Femina pack as my base sheet.Next I created a shaker element using Happy Birthday pack from Papericious again.In the center I have put number 3 which is diecut on Gold sheet.

I have used MFT Beary Special Birthday Stamp set,stamped the images with Black Archival ink and then water colored with zig pens.

Happy Birthday sentiment is from Papericious birthday paper pack.

I enjoyed making this cute adorable card.Hope you liked it too.

I am linking this card to following Challenges:

My card has number 3 and I have also used three balloons,I feel this fits to trio challenge by Simons.


Thanks for stopping by!!
Hugs,Anushree 


Tuesday, 31 January 2017

12 month Baby Calendar

Hello everyone!!

Anushree here with another post showcasing the versatility of Papericious paper packs.

So let me show you the picture of my super cute calendar


Supplies used:

1. Handmade paper(different shades)
2. Papericious Little star paper pack
3. Wire binder
4. Some diecuts and embellishments from my stash
5. Clear glue and double sided tape

Instructions:

I started with cutting handmade paper as base sheets for calendar.I took 13 such sheets of equal size which comprises one as main front cover and rest as 12 months of calendar.After that I covered them with designer printed paper.Then I got wire binding done from a local printing shop.This was time saving and much easier than doing myself. 


So now I am all ready to explore this Little star Pack from Papericious


Before that I have taken a green color cardboard and made the back base with holder.I have used cutting knife and puncher for doing this.


Now I have done some fussy cutting from the Little star Paper pack,I have also done some die cutting using the same paper pack.


Now its time to stick and explore creativity,Next I am showing you pictures month by month,I have also decorated and made photo mats on back of each month cover.Staring with front and back of calendar.


Now months


Showing some close ups now


Hope u liked it.This one was super fun to make.

I am entering this project to following challenges:

Happy Crafting.
Anushree